The parts were scanned and cleaned up from copies of the original kit printwood, so the shapes are as accurate as the die-cutting of the Frog originals. I would be grateful for feedback on how they fit together, as I am quite prepared to fiddle around with the artwork if necessary.
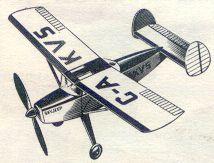
Patterns for the printed flying surfaces are provided. The shade of blue used is not guaranteed accurate - the original printing was dark blue. This rather bright shade used for the artwork actually comes out quite dark on my printer, but may not on yours. You should be able to adjust the shade of the bitmaps in any graphics or paint program to suit your printer. For an excellent tutorial on how to ink jet print directly onto balsa sheet, visit Paul Bradley's excellent web site here.
What thickness of wood you use is an interesting question. Thanks to Tony Crollie, I have been able to borrow the rear fuselage, including tail surfaces, of a Junior Series B.A.Swallow. It has been painted since it was first built (and has been doing service as an RTP model) but it has been possible to measure the wood thickness of the parts. My trusty vernier callipers give a value of 0.045", or approx. 1/22". Put another way, 1.14 mm.
If you want to fly indoors and get reasonable duration, I think you would be best using 1/32” sheet for everything. This will require all the fuselage formers to be reinforced top and bottom, and the nose former doubled up (or faced with 1/64” ply), but I think it would be strong enough. If you want to make a more robust replica, then find the lightest 1/20” sheet you can find and give it a bit of a sand! You will have to adjust slots and cut-outs to suit the sheet you are planning to use.
Download Skyjeep pdf file here (366 KB)
Download Skyjeep bmp files here (363 KB)
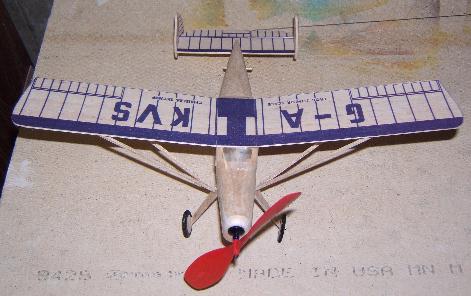
Jeremy Woods, from Wichita, Kansas, is first off the mark with a model built from this plan. He used a multiple of different wood sizes 1/16", 1/24", and 1/32". All the tail surfaces are adjustable thanks to hinges made from small wire. Jeremy got round the problem of not having a printer with a straight through paper path by printing out the decoration onto tissue, then attaching that to the wooden sheet. The prop was a 4 inch item from a guillow's kit, and the motor 4 loops of 3/32 F.A.I. sport rubber.
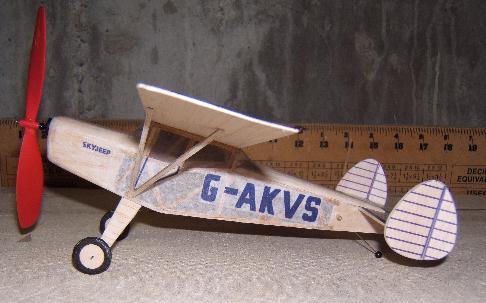
Jeremy has flown it a couple of times in his backyard and he says it flies very well considering it is made to fly indoors. A little wobble, but that can probably be attributed to the slight winds. The plane also takes off and lands quite nicely.
Thanks for sending the photos Jeremy.
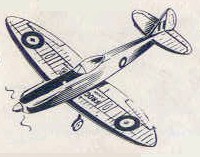
Westland Wyvern
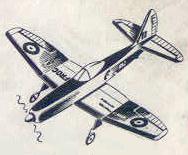
Another charming little Junior scale type – this time from the fighter range.
At first glance an unlikely candidate for the Junior range, the real Westland Wyvern was an impressive beast - a large "torpedo fighter" with contra rotating props.
However, at the time the kit came out, I guess it was a fairly high profile and exciting aircraft –
now of course it is not regarded as a great success, and its role was soon superseded by pure jet aircraft.
The Frog version is naturally rather simplified, but should make into a very attractive model. It is based on the T.F.1 version with the Eagle engine
(you can tell this from the exhaust and intake details). Many thanks to Peter
Williams for sending me a copy of the plan. I have had a lot of fun with this one working out and drawing up the
full size part shapes and colouring them in. I will be building one myself, so will be able to make corrections
if I run into fit problems.
There are various options regarding the balsa parts, and I have produced three distinct sets, with the plan
as a separate file.
Version 1: Just the outlines, with no other detail. Use this one if you are intending to airbrush the model
in a realistic colour scheme, or just fancy the look of unspoiled Balsa!
Version 2: These parts contain markings based on the views shown on the plan and instructions. So, the control surfaces,
exhaust detail, and markings etc. are included, plus areas of dark grey where black is shown on the plan.
No idea if this is what was on the original – I doubt they would have printed so many different colours.
In fact I am sure they would have only printed one! You can of course edit the colours of the bitmap
versions using your favourite graphics program. The upper fuselage needs to be painted after assembly.
Version 3: My attempt to create a vaguely realistic scheme for the Wyvern which you can print onto the wood using
your ink jet printer. The colours (at least on my printer) are a reasonable match to extra dark sea grey and sky.
There are obvious problems though – typical of pre-printed kits – including the fin only having one printed side,
and the wing and tailplane being bare wood underneath.
I guess you could pass the wood through the printer
first upside down and just give it a coat of sky ink? This is all theory, of course, as my printer does
not have a straight through paper path. The two nose blocks will also need to be painted to match after shaping.
Download Wyvern plan pdf file here (87 KB)
Download Wyvern plan bmp files here (122 KB)
Download Wyvern parts version 1 pdf file here (27 KB)
Download Wyvern parts version 1 bmp files here (14 KB)
Download Wyvern parts version 2 pdf file here (93 KB)
Download Wyvern parts version 2 bmp files here (32 KB)
Download Wyvern parts version 3 pdf file here (92 KB)
Download Wyvern parts version 3 bmp files here (33 KB)
Cessna 140
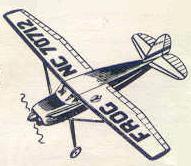
Like the Skyjeep, I think this one should be a good flyer. The shapes of the wings and tailplane have been taken from the 1/4 size
drawing on the plan, so no guarantees they are 100% correct. Likewise, the decoration on these surfaces is also taken from this view, and
may not be exactly the same as the original kit.
I have provided two sets of parts for the model, one in blue and one in red, as I am not sure what colour the original one was.
Download Cessna plan pdf file here (89 KB)
Download Cessna plan bmp files here (126 KB)
Download red Cessna parts pdf file here (66 KB)
Download red Cessna parts bmp files here (33 KB)
Download blue Cessna parts pdf file here (66 KB)
Download blue Cessna parts bmp files here (33 KB)
Spitfire
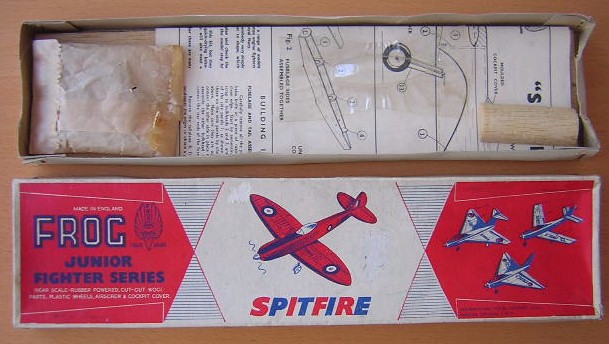
After missing out on quite a few examples, I finally managed to win a Frog Junior kit on Ebay without breaking the bank, so am happy to be able to post some photos
here as as well as the plan, and an exact copy of the printwood parts.
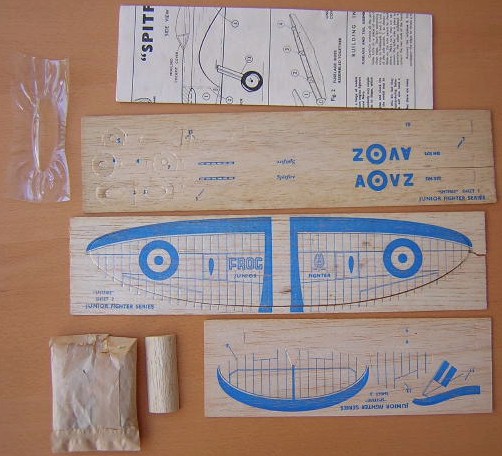
Here are the complete kit contents, which are in excellent condition considering it is over 40 years old.
I took the opportunity to measure the thickness of the wood provided in the kit, and it was between 1/20" and 1/18". The thickest
sheet was the one with the tail surfaces on - not an ideal situation!
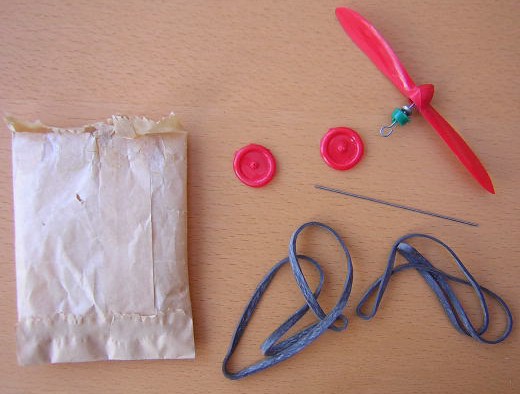
This is what you get in the little paper bag. Interesting that two rubber motors were provided.
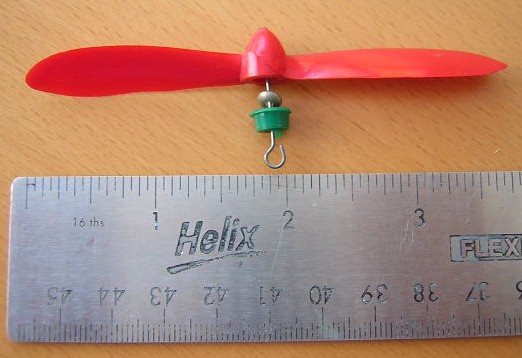
Here is a closer look at the prop and nose bush, supplied ready assembled, including a washer.
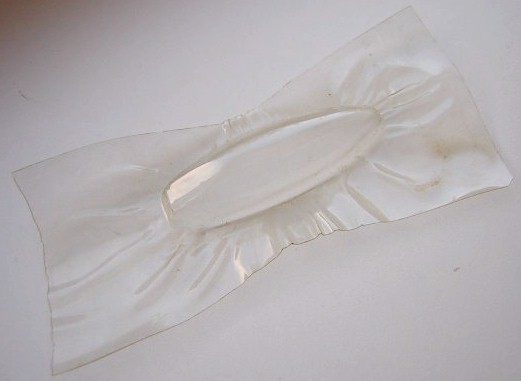
Finally here is the canopy moulding, which looks very much like it was plunge moulded by hand, rather than vac-formed.
Perhaps a bit thick for the size of model, but nice and clear.
Download Spitfire plan pdf file here (93 KB)
Download Spitfire plan bmp files here (124 KB)
Download coloured Spitfire parts pdf file here 408 KB)
Download coloured Spitfire parts bmp files here (382 KB)
Download outline only Spitfire parts pdf file here (25 KB)
Download outline only parts bmp files here (23 KB)
General notes on printing the plans
The small T shaped marks you will see on some of the sheets are spaced 50 mm apart, to help you get the pages the correct size.
The pdf files should print off at exactly full size if you set your printer to A4 paper.
This should work even if you
do not have A4 paper in the printer, as the margins have been left deliberately large.
You will need Acrobat reader to view the pdf files, which is a free download from
the Adobe web site
Bitmap files are also provided in case you prefer to work with those.
Back to home page
Back to Frog Senior Series plans
Back to Senior Series photo gallery
Back to rubber powered scale plans
Back to more rubber model plans
Back to Junior Series plans
On to Frog glider plans
On to the 1960 catalogue page
On to the Wilmot Mansour Commemorative Exhibition report
On to the links page
After missing out on quite a few examples, I finally managed to win a Frog Junior kit on Ebay without breaking the bank, so am happy to be able to post some photos here as as well as the plan, and an exact copy of the printwood parts.
Here are the complete kit contents, which are in excellent condition considering it is over 40 years old.
I took the opportunity to measure the thickness of the wood provided in the kit, and it was between 1/20" and 1/18". The thickest sheet was the one with the tail surfaces on - not an ideal situation!
This is what you get in the little paper bag. Interesting that two rubber motors were provided.
Here is a closer look at the prop and nose bush, supplied ready assembled, including a washer.
Finally here is the canopy moulding, which looks very much like it was plunge moulded by hand, rather than vac-formed. Perhaps a bit thick for the size of model, but nice and clear.
Download Spitfire plan pdf file here (93 KB)
Download Spitfire plan bmp files here (124 KB)
Download coloured Spitfire parts pdf file here 408 KB)
Download coloured Spitfire parts bmp files here (382 KB)
Download outline only Spitfire parts pdf file here (25 KB)
Download outline only parts bmp files here (23 KB)
The small T shaped marks you will see on some of the sheets are spaced 50 mm apart, to help you get the pages the correct size.
The pdf files should print off at exactly full size if you set your printer to A4 paper.
This should work even if you
do not have A4 paper in the printer, as the margins have been left deliberately large.
You will need Acrobat reader to view the pdf files, which is a free download from
the Adobe web site
Bitmap files are also provided in case you prefer to work with those.
Back to home page
Back to Frog Senior Series plans
Back to Senior Series photo gallery
Back to rubber powered scale plans
Back to more rubber model plans
Back to Junior Series plans
On to Frog glider plans
On to the 1960 catalogue page
On to the Wilmot Mansour Commemorative Exhibition report
On to the links page
The pdf files should print off at exactly full size if you set your printer to A4 paper. This should work even if you do not have A4 paper in the printer, as the margins have been left deliberately large.
You will need Acrobat reader to view the pdf files, which is a free download from the Adobe web site
Bitmap files are also provided in case you prefer to work with those.
Back to home page
Back to Frog Senior Series plans
Back to Senior Series photo gallery
Back to rubber powered scale plans
Back to more rubber model plans
Back to Junior Series plans
On to Frog glider plans
On to the 1960 catalogue page
On to the Wilmot Mansour Commemorative Exhibition report
On to the links page